Wednesday, December 29, 2010

Almond Chicken

This wasn't my ideal recipe for Almond Chicken. I have so many to try out and this one just didn't make the cut. Some changes I made were to use pea pods and water chestnuts rather than mushrooms and bamboo shoots. I also used way too many carrots and peanut oil rather than vegetable oil. I would have preferred additional almonds, and there was hardly enough sauce (I had to make more at the last minute. Finally, I didn't appreciate the taste of the wine in this dish.

Almond Chicken

1 1/2 c. water
4 T dry sherry
2 1/2 T cornstarch
4 t. soy sauce
1 t. instant chicken bouillon granules
4 whole chicken breasts
1 egg white
1/2 t. salt
1 large carrot
6 green onions
3 stalks celery
8 fresh mushrooms, sliced
3 c. vegetable oil
1/2 c. blanched whole almonds (about 3 oz.)
1 t. grated fresh ginger root
1/2 c. drained, sliced bamboo shoots

1. Combine water, 2 Tablespoons of the sherry, 1 1/2 Tablespoons of the cornstarch, the soy sauce, and bouillon in small saucepan. Cook and stir over medium heat until mixture boils and thickens about 5 minutes. Keep warm.
2. Remove skin and bones from chicken. Cut chicken into 1-inch pieces. Combine remaining 2 Tablespoons sherrt, 1 Tablespoon cornstarch, egg white, and salt. Mix in chicken pieces.
3. Peel carrot and dice. Cut onions into 1-inch pieces. Cut celery diagonally into 1/2-inch slices.
4. Heat oil in wok over high heat until it reaches 375ºF. Add chicken pieces, one at a time, to hot oil (cook 1/3 of the pieces at a time). Cook until light brown, 3 to 5 minutes. Drain on absorbant paper. Repeat with remaining chicken.
5. Remove all but 2 Tablespoons oil from wok. Stir-fry almonds in the oil until golden, about 2 minutes. Drain.
6. Add carrot and ginger to wok. Stir-fry 1 minute. Add all remaining vegetables. Stir-fry until crisp-tender, about 3 minutes. Mix in chicken, almonds, and sauce. Stir-fry until hot. Makes 4-6 servings.

Tuesday, December 21, 2010

Heavenly Peas with Mashed Potatoes


I couldn't believe how GREEN this dish was, it made me think of the Grinch!! I am trying to be really frugal these days and I had all the ingredients for this recipe. I like the consistency and taste of these potatoes, but this recipe is not for those who loathe peas!! I think I would keep out just the peas next time so that all the onions get puréed. I made the mistake of preparing this dish before my main meal was ready, and it should be prepared right before you serve or it will be too cold. I also could have mashed the potatoes a bit more, it would have been better if there were no chunks.

Heavenly Peas with Mashed Potatoes

1 10-oz. pkg frozen peas
1/4 c. chopped onion
1 T utter
1/4 t. salt
1/8 t. pepper
2 T chicken broth
1/2 c. dairy sour cream
4-5 c. prepared hot mashed potatoes

1. Cook peas and onion in butter for 5 minutes or until tender, stirring occasionally. Remove from heat and stir in the salt and pepper. Remove 1/2 cup of the pea-onion mixture and set aside.
2. Place remaining pea-onion mixture in a blender container or food-processor bowl along with the broth. Cover and blend or process until smooth. If necessary, add an additional tablespoon of broth to make the mixture whirl in the machine.
3. Stir together puréed peas and the reserved 1/2 cup whole pea-onion mixture. Set aside.
4. In a large bowl stir sour cream into hot mashed potatoes. Add the pea mixture to potatoes. Fold gently to combine. Makes 8 side-dish servings.

Fluffy Meat Loaf

It is raining cats and dogs so I thought I'd whip up some comfort food. This was the meatloaf of leftovers!! I had some ground veal and ground pork left over from my last meatloaf, I had some saltine crackers for the cracker crumbs, I had an onion that was almost "overdue", and some half-and-half to use up. I enjoyed this recipe, it wasn't as greasy as my grandmother's meatloaf recipe. I used three of my vintage half-loaf-pan sized refrigerator dishes, and the meat went almost to the top. I will have the leftovers from this meatloaf warmed up or in sandwiches for the rest of the week!!

Fluffy Meat Loaf

1 lb. ground beef
1/2 lb. ground lean pork
2 c. cracker crumbs
1 egg, beaten
1 1/2 c. milk
4 T minced onion
2 t. salt
1/4 t. pepper
1/4 t. dry mustard
1/8 t. sage

1. Moosh all the ingredients together in a large bowl and press into one large loaf pan or 6 individual loaf pans.
2. Bake at 350ºF for 1 1/2 hours (large pan) or 45 minutes (small pans).

Wednesday, December 15, 2010

Fettuccine Alfredo

I had several similar recipes for pasta Alfredo, this time I decided to use tortellini rather than fettuccine. This is a really simple recipe and it tasted good. I toasted some chopped almonds and placed those on top, normally I use pine nuts but they are so expensive right now!! This is a keeper recipe, and I don't think I have any more Alfredo recipes to test.

Fettuccine Alfredo

12-oz. fettuccine noodles
1 c. half-and-half
4 T butter
1/2 c. grated Parmesan cheese
1/4 t. salt
1/4 t. pepper

1. In a saucepot, prepare fettuccine as label directs. Drain pasta and return to saucepot.
2. Over medium-low heat, heat fettuccine, half-and-half, butter, cheese, salt, and pepper. Stir to make sure pasta is evenly covered with sauce. Makes 4 main-dish servings.

Thursday, October 28, 2010

General Tso's Chicken


There were so many ingredients in this recipe, but I decided to try it out anyway. I bought some dried chiles in the Mexican food aisle for a buck, and I had all the other ingredients. I served this dish over rice. I have to say I was a bit apprehensive about those chile peppers, since I don't like spicy dishes. But, it turned out just spicy enough for me!! Don't eat the pods, I didn't even eat the green onions!! The technique of getting the chicken ready to deep-fry was weird, but I guess it ended up working out OK. When I added the oil so the chicken wouldn't stick together it didn't really work. I used peanut oil and only put a bit in the bottom of a small frying pan, turning the chicken once the bottom side was golden brown. I didn't find that the soy sauce or wine taste overpowered the dish, as can sometimes happen, and I used chicken breasts rather than thighs. I will definitely keep this recipe. In fact, after eating one serving I almost want another right now!!

FOLLOW-UP: I ate the leftovers a couple of hours after the first taste and it was WAY more spicy!! I don't know if it was because I left the peppers in the container in the fridge or if the spices just "matured", but my mouth is burning right now. Other people won't notice it as much, but I am super sensitive to spicy heat!! Next time I will try to remove the pepper before I store the leftovers and see if that helps keep the heat down for me.

General Tso's Chicken

2 T cornstarch
1/2 c. water
1 t. garlic powder
1 t. ground ginger
1 c. sugar
1/2 c. soy sauce
1/4 c. white vinegar
1/4 c. dry white wine
1 1/2 c. hot chicken broth
3 lb. boneless, skinless chicken thighs, cut into chunks
1/4 c. soy sauce
1 t. white pepper
1 egg
1 c. cornstarch
1 c. oil
oil for deep frying
1 t. oil
16 small dried hot peppers
2 c. sliced green onions

1. Whisk together 2 Tablespoons of cornstarch with water. Add garlic powder, ginger powder, sugar, 1/2 cup of soy sauce, vinegar, wine, and chicken broth together until the sugar dissolves.
2. Mix together in separate bowl chicken, 1/4 cup of soy sauce, and white pepper. Whisk in egg. Add 1 cup of cornstarch and mix until chicken is coated. Add 1 cup oil to separate chicken pieces. Divide the chicken into batches and deep fry at 350ºF until crispy and browned. Drain on paper towels and keep warm.
3. Heat 1 teaspoon of oil in a wok or large skillet and heat on high until nearly smoking. Add hot peppers and green onions and stir-fry briefly.
4. Stir reserved sauce and add to wok with pepper and onion. Add reserved cooked chicken and lower heat to medium-high. Cook until sauce is bubbling hot and thickens. Makes 8 servings.

Wednesday, October 27, 2010

Chinatown Almond Chicken

I have decided not to keep this recipe, assuming I will find a better Almond Chicken recipe in my file box!! I didn't have any pea pods, so I used frozen peas instead, probably too many of them!! The fact that I don't prefer the taste of wine or soy sauce in general, the sauce was not the best part of this dish. The chunks of chicken were good, though, and the taste of almonds. I don't think I would use the whole almonds unless I didn't have slivered. I used peanut oil and it was yummy.

Chinatown Almond Chicken

1 1/2 lb. chicken breast, skinned, boned, and cut into 1/2-inch cubes
1 t. ginger
2 t. sugar
1 T cornstarch
3 T water
3 T soy sauce
1/3 c. sherry
12 oz. Chinese pea pods, thawed
1/4 c. oil
1 c. whole almonds

1. In a bowl, mix ginger, sugar, and cornstarch.
2. Blend in water, soy sauce, and sherry.
3. In a wok, heat oil over medium heat. Add almonds, stir and cook about 3 minutes.
4. Add chicken and cook just until meat turns white.
5. Pour in sherry mixture and cook until sauce thickens.
6. Add pea pods and stir-fry until hot and glazed. Serve at once. Serves 4.

Tuesday, October 26, 2010

Pasta in Cream Sauce

This was a keeper recipe, so simple!! I used frozen cheese tortellini and it was yummy!! Add some bread and a salad and you have a complete meal. The only thing I didn't like was that the sauce was a bit grainy. I removed it from the heat to stir in the cheese because I didn't want to have a grainy texture, but it was grainy anyway. Perhaps I will try shredded Parmesan cheese the next time, or follow the recipe and stir in the pasta with the sauce instead of stirring into the sauce.

Pasta in Cream Sauce

1 c. whipping cream
3 T snipped fresh basil
2 cloves garlic, minced
1/2 t. freshly ground black pepper
8 oz. tri-colored pasta, cooked and drained
3/4 c. grated Parmesan cheese

1. In a saucepan heat cream, basil, garlic, and pepper just until bubbly and slightly thickened.
2. Toss with pasta and cheese. Serves 8.

"Sizzler" Blue Cheese Dressing

I have had trouble recently finding a blue cheese dressing that is not too vinegary!! So, I thought I would try out a recipe I found that purported to be from the famous Sizzler steakhouse. I think this restaurant single-handedly made salad bars "cool", and I have cravings for their salad dressing all the time. In fact, when I was there recently I found a big white blob in my dressing that was not cheese. I thought it might be cream cheese, but the waitress checked in the back and told me it was sour cream. So, this recipe might be authentic. I will keep it, the base of the dressing was good. I got a blue cheese that wasn't too "blue" since I only prefer the flavor of blue cheese instead of chunks. The cheese flavor was a bit too strong, but still much better than the vinegary-tasting alternatives of ready-made dressings. I have another recipe from Bob's Big Boy, and since theirs is the only one I will buy over the counter I will try that one next.

"Sizzler" Blue Cheese Dressing

1 T lemon juice
1 T white vinegar
1 T grated onion
1 t. salt
1/2 t. coarsely ground black pepper
2-4 oz. blue cheese, crumbled
2 c. sour cream
2 c. mayonnaise

1. In a large glass bowl, combine lemon juice, vinegar, onion, salt, pepper, and blue cheese. Chill overnight.
2. The next day, stir in sour cream and mayonnaise until mixed well.
3. Will keep in the refrigerator in an airtight container for up to 1 month. Makes 5 cups.

Scalloped Potatoes


I had some leftover evaporated milk and I had gotten a great deal on a bag of potatoes, so I thought I would make this recipe that I found on the label of the evaporated milk. I was pleased, usually I prefer potatoes "au gratin", but I think this was just a bit healthier!! The crust of Parmesan cheese on the top was yummy. This was good as leftovers, too!! To get a uniform sized thin slice I use a vintage VegOMatic!!


Scalloped Potatoes

2 lb. (about 6 medium) potatoes, peeled and sliced thinly
3 T butter
1/4 c. chopped onion
3 T flour
1 t. salt
1/4 t. pepper
1 can evaporated milk
1 c. water
1/3 c. grated Parmesan cheese

1. Preheat the oven to 350ºF. Grease an 11" x 7" baking dish.
2. Place potatoes in large saucepan. Cover with water, bring to a boil. Cook over medium-high heat for 3-4 minutes. Drain potatoes.
3. Heat butter in same saucepan over medium heat. Add onion and cook, stirring occasionally, for 1-2 minutes. Stir in flour, salt, and pepper. Gradually stir in milk and water. Cook, stirring constantly, until mixture comes to a boil. Remove from heat.
4. Arrange potatoes in prepared baking dish and pour milk mixture over potatoes. Sprinkle with cheese.
5. Bake for 25-30 minutes or until potatoes are tender and cheese is light golden brown. Serves 8.

Baked Macaroni and Cheese


I won't be keeping this recipe, in fact I couldn't even finish eating it!! I don't know if it was the fact that it was made with evaporated milk, the combination of cheeses, or the bread crumbs on the top, but it was not good enough to keep. I used some cheddar, mozzarella, and cream cheese. I grated the onions because I didn't want chunks of onion in the casserole. I am not used to having a bread crumb topping, but I have since been told that perhaps I should have used torn up bread instead of the canned bread crumbs.

Baked Macaroni and Cheese

1 pound dried, short pasta (elbows are best)
generous pinch of salt
2 T butter
2 T flour
1 can evaporated milk
1 bay leaf
1/2 small onion, diced
2 1/2 c. grated cheese (or combination of cheeses) of your choice
1 c. bread crumbs, mixed with 2 T melted butter

1. Boil pasta in medium saucepan.
2. Liberally butter an 8" x 8" ceramic or glass baking dish. Preheat oven to 350ºF.
3. Melt butter over medium heat in a medium sized saucepan. Whisk flour into melted butter, continuing to whisk constantly for 2-3 minutes. Quickly add the milk and stir. Add bay leaf and onion. Cook for 10 minutes, stirring every 1-2 minutes. Do not let it bubble, reduce heat if necessary.
4. Remove pasta when just short of done. Drain pasta, but do not rinse.
5. Remove sauce from heat, remove the bay leaf, and stir in about 3/4 of your cheese, stirring until melted. Add the drained pasta into the sauce and stir until completely coated.
6. Pour pasta into prepared baking pan. Sprinkle with the rest of the cheese, followed by the bread crumbs.
7. Bake for 25 minutes. Serves 4-6.

Thursday, September 30, 2010

Caesar Salad


I had some chicken to use up, and I have been attempting to eat more healthy foods. So, I got into my salad recipe box. This recipe was easy and tasty, although I am not sure that the dressing is authentic Caesar. I suppose they substituted mayonnaise rather than use raw eggs, which is a smart choice!! I liked the presentation of the Romaine lettuce, but only one of my halves was "pretty". The home-made croutons were fantastic, I won't ever throw away leftover sourdough bread again!!

After I took the picture at the top of this page I realized that I was eating this salad as my dinner, so I added the other half of the lettuce, some chopped up chicken, and finished off the dressing. I had some croutons left over, but I only used 3 slices of bread. I wouldn't have had enough salad dressing if I had more than 3 of the half-head servings, so next time I will make a bit more.

This is definitely a keeper. The picture below is my dinner-sized Chicken Caesar Salad. I used crushed garlic and shredded Parmesan, not having a hunk for shavings. There was plenty of cheese in the dressing. Also, serving the salad with warm croutons is yummy. I wish that I had made the salad dressing ahead of time so it was cold from the refrigerator. Oh, I also used some garlic powder when seasoning the croutons.

Caesar Salad

4 slices of sourdough bread, cut into cubes
1 T olive oil
salt and freshly ground pepper
3 T olive oil
1 T mayonnaise
1 T lemon juice
1/2 t. Dijon mustard
1/4 t. Worcestershire sauce
1 garlic clove, minced
2 T grated Parmesan cheese
1 pkg. of Romaine hearts (3 heads)
Parmesan cheese for shaving garnish
freshly ground pepper

1. Heat oven to 350ºF. Toss the bread cubes with 1 Tablespoon of olive oil and season with salt and pepper. Spread the cubes on a baking sheet and bake for 10 minutes, or until golden. Set aside to cool.
2. In a separate bowl, whisk together the 3 Tablespoons of olive oil, mayonnaise, lemon juice, mustard, Worcestershire sauce, garlic, and shredded Parmesan cheese until well blended.
3. Remove any wilted outer leaves from the Romaine hearts. Cut off the core end and slice the head lengthwise.
4. Place the Romaine halves on plates with croutons and drizzle with the dressing. Top with Parmesan shavings and season with freshly ground pepper. Serves 4-6.

Thursday, September 16, 2010

Chocoladamias

These sounded good, but I didn't like them. I don't know if it was due to the fact that I used cashews instead of macadamias or that they didn't cook through, but I won't be keeping this recipe. I much prefer the taste of the blondies with chocolate chips that my grandmother made which were called Congo Bars and used brown sugar. I am going to go through my other blondies recipes and pull them out because I have realized that I already have the perfect blondies recipe!!

Chocoladamias

1/3 c. butter
1/2 c. white baking pieces
2 eggs
1 c. sugar
1 t. vanilla
1 c. flour
1/4 t. salt
1/2 c. chopped macadamia nuts
1/2 c. milk chocolate pieces

1. Grease a 9" x 9" baking pan and line the bottom and sides with waxed paper. Grease the waxed paper.
2. In a small saucepan cook and stir butter and white baking pieces over low heat until melted, mixture may separate. Set aside.
3. In a small mixer bowl beat eggs. Gradually add sugar, beating until light. Add butter mixture and vanilla. Add flour and salt, mixing well. Stir in nuts and chocolate pieces. Turn into prepared pan.
4. Bake in a 325ºF oven for 35 minutes or until top is golden.
5. Cool in pan on a wire rack. Loosen edges and invert. Remove waxed paper and invert again. Cut into bars. Makes 36 bars.

Wednesday, September 15, 2010

Orange Basil Marinated Chicken

I probably won't keep this recipe, it was basically marinating and boiling the chicken in an orange flavored sauce. I didn't notice until after I cooked up some rice that they want you to serve it cold. I saved one breast for leftover, perhaps it will be good cold in a salad? I don't think I would want to eat this just plain cold, though. I also had to wipe off the parsley and basil from the top before I ate it.

Orange Basil Marinated Chicken

4 whole chicken breasts, skinned and halved
1/4 c. orange juice
1/4 c.oil
2 T oil
2 T chopped fresh parsley
1/2 t. basil leaves
1/2 t. grated orange peel
1/4 to 1/2 t. salt
1/4 t. pepper

1. Arrange chicken breast halves in an un-greased 13" x 9" non-metal baking dish.
2. In small bowl, combine remaining ingredients and pour over chicken.
3. Cover with foil and refrigerate for 4-6 hours.
4. Heat oven to 375ºF.
5. Keeping the foil over the chicken, bake for 35 minutes.
6. Uncover the chicken and continue baking for 20-30 minutes, basting frequently until chicken is tender and no longer pink.
7. Drain and cool chicken. Wrap chicken tightly and refrigerate until serving time. Serve cold. Serves 8.

Thursday, August 26, 2010

Grandma's Meatloaf

I found this recipe in my box, it had been typed by me from another hand-written recipe. I had to call my mom to see if this was, indeed, Grandma's recipe for meatloaf. I had hand-written "add some Worcestershire sauce, too" at the bottom. My mother said that she never made her meatloaf with pork and veal, only ground beef. I don't think I have ever had pork and veal in a meatloaf before, in fact I prefer not to use veal (philosophical issues). But, I figured I needed to do it Grandma's way the first time.

I grated the onion instead of chopping, I don't like eating onions but I like the flavor. I used 1 pound ground beef, 1/2 pound ground pork, and 1/2 pound ground veal. I didn't have any milk, so I used some half-and-half instead. I think I might have used too much salt, so I will actually measure next time!! Needless to say, this is of course a keeper recipe!! I will try it without the veal next time, and then without the pork to see the difference. This was quite tasty and I am looking forward to sandwiches tomorrow.

Grandma's Meat Loaf

2 lb. ground beef, veal, and pork
1 egg
1/2 c. dry bread crumbs
1 T chopped onion (or more)
1 t. salt
pepper
1 c. milk

Bake 2 hours in moderate oven.

That is how the recipe reads. I mooshed all the ingredients together with my hands until incorporated. I placed the meatloaf into a loaf pan and baked at 350ºF for about 2 hours until the top was crispy. The juice overflowed the pan a little, so make sure you have a pan on the bottom shelf to catch the juices. I let it set for a couple of minutes, and then I cut off a piece to photograph. I noticed that there was a lot of juice in the bottom of the pan so, tilting the pan to make the grease go to the end, I removed the loaf to a piece of foil to store it in the fridge. I had to wipe off the meat before I ate it, it was really greasy (but tasty!!)

Wednesday, August 25, 2010

Orange Roasted Chicken

This is a recipe for a roasted chicken, but I decided to try it with a double chicken breast instead. I halved the ingredients and had to lower the cooking time. I placed the orange halves on the roasting rack under the chicken breast. There was a lot of gravy and I chose to serve it over rice. The orange flavor was subtle, and worked well with the rosemary flavor. But, next time I would us a fresh sprig of rosemary so I could fish it out, or grind the dried rosemary.

Orange Roasted Chicken

1 roasting chicken (5-lb.)
1/4 c. butter, melted
salt and pepper
1/2 t. dried rosemary
2 oranges, cut in half
1/4 c. corn starch
2 c. orange juice
1 c. chicken bouillon
1 T brown sugar

1. Preheat oven to 325ºF.
2. Brush chicken with butter and season with salt, pepper, and rosemary. Place oranges in chicken cavity. Roast in oven for about 2 1/2 hours.
3. Remove chicken from pan. Sprinkle corn starch into the pan. Stir and cook over medium heat just until smooth. Remove from heat.
4. Gradually stir in remaining ingredients until smooth. Bring to a boil over medium heat, stirring constantly, and boil 2 minutes. Makes 6 servings.

Monday, August 23, 2010

Bittersweet Farm Chicken

Back to chicken dishes!! I had some oranges to use up, and this called for the zest of about 7 oranges. The recipe I will work on tomorrow calls for orange juice, so that worked out well!! Luckily I had some orange-flavored liqueur, I must have used it in another recipe. Instead of cooked baby carrots, which would have been good but I don't like cooked carrots, I used the extra liquid in some rice water.

I will definitely be keeping this recipe!! I halved the recipe and used 2 single boneless breasts. The chicken was moist and tender, and my experiment with the flavored rice worked perfectly. I almost wanted to eat another helping tonight, but will save it for breakfast tomorrow!! If you don't prefer orange flavored dishes you probably won't like this, but the orange flavor wasn't overwhelming. I couldn't even taste the soy sauce, which was great for me!!

Bittersweet Farm Chicken

1/2 c. flour
1 t. salt
1/4 t. pepper
1 frying chicken, cut into serving pieces
8 T butter, divided
1/4 c. lemon juice
1/4 c. orange-flavored liqueur
1/4 c. honey
2 T orange zest
1 T soy sauce
whole cooked baby carrots

1. Preheat oven to 350ºF.
2. Combine flour, salt, and pepper in a large plastic bag. Add chicken pieces, a few at a time, to the bag. Shake to coat completely with flour mixture.
3. Melt 4 Tablespoons of butter in a large baking pan.
4. Roll the chicken in the butter to coat all sides. Arrange the chicken skin-side down in a single layer in the pan.
5. Bake for 30 minutes.
6. Meanwhile, melt remaining 4 Tablespoons of butter in a small saucepan over medium heat. Stir in lemon juice, liqueur, honey, orange zest, and soy sauce. Reserve 2 Tablespoons of the mixture.
7. Remove chicken from the oven and turn the pieces over. Pour remaining honey mixture over the chicken. Continue baking, basting occasionally, for 30 minutes or until chicken is glazed and tender.
8. Toss remaining honey mixture with cooked carrots. Serve with chicken. Garnish as desired. Makes 4 servings.

Saturday, August 21, 2010

Sunrise Blueberry Coffee Cake

This was a yummy coffee cake, I will definitely be keeping this one!! I used up all my really large blueberries in this, saving the smaller ones for scones or muffins. The only thing I would do differently next time is either wait for the cream cheese to soften or use the whipped variety. I smeared butter all over the top and it was quite tasty. I used almonds instead of walnuts and they were a good substitute. I think that it would display better with the nuts on the top, not the way I photographed it!! I cut the recipe by thirds and it fit perfectly into my smaller tube pan. This might work in individual tube pans, but you would have to use the smaller blueberries and squirt the filling through a frosting decorator so you had more control. I will try this the next time I bake this recipe up!! It might even work as a muffin.


Sunrise Blueberry Coffee Cake

6 oz. cream cheese, softened
2 T confectioner's sugar
1 T freshly squeezed lemon juice
2 c. flour
1 t. baking powder
1 t. baking soda
3/4 t. ground nutmeg
3/4 t. ground cinnamon
1/4 t. salt
1 cup, plus 2 T sugar
1/2 c. butter, softened
3 eggs
1 t. vanilla
8 oz. sour cream
2/3 c. fresh blueberries
1/2 c. chopped walnuts

1. Preheat oven to 350ºF.
2. Grease and flour a 10-inch tube pan.
3. In a small bow, with a fork, beat together cream cheese, confectioner's sugar, and lemon juice until smooth.
4. In a medium bowl, whisk together flour, baking powder, baking soda, 1/4 t. nutmeg, 1/4 t. cinnamon, and salt.
5. In a large bowl, with an electric mixer on medium speed, cream 1 cup sugar and butter, mixture will be dry. Add eggs one at a time, beating well until smooth. Beat in vanilla. On low speed, add flour mixture alternating with sour cream. With a rubber spatula, fold in picked-over blueberries.
6. Pour half of the batter into prepared pan. Spoon cream cheese mixture over the batter and spread to within 1/2-inch of edges. Pour remaining batter over mixture and smooth with a spatula.
7. In a small bowl, with a fork, combine walnuts, remaining 2 Tablespoons of sugar, 1/2 teaspoon nutmeg, and 1/2 teaspoon cinnamon. Sprinkle over the batter.
8. Bake for 1 hour. Transfer to a wire rack to cool. Serves 10-12.

Friday, August 13, 2010

Guacamole

This recipe was a bit different from the others I have tried. There was a ton of non-avocado ingredients, and I prefer more avocado. I liked the addition of the toasted pine nuts on the top, but prefer lime juice to lemon juice in guacamole. The use of coriander, which is the seed of cilantro, rather than cilantro was interesting, but I prefer the cilantro. I didn't have any yellow onion, so I used the white part of green onion instead. I won't keep this recipe, but will remember the pine nuts for the top when I make my own guacamole in the future.

Guacamole

1 large ripe avocado, peeled and mashed
1/2 c. minced onion
1 clove garlic, minced
2 tomatoes,peeled, seeded, and chopped
2 T lemon juice
1/4 t. ground coriander
1/4 t. salt
1/4 c. finely chopped toasted pine nuts
pepper

1. Reserve 2 teaspoons tomato and pine nuts for garnish.
2. Combine remaining ingredients well.
3. Cover and chill for 1 hour before serving.
4. Sprinkle tomato and pine nuts on top. Makes 2 cups.

Guacamole

I bought some fresh Roma tomatoes so I could try this guacamole recipe. I am not usually a tomato eater, but they added another textural dimension to the guacamole. As with the other recipes, though, I prefer my usual winging it technique. The blender technique didn't seem to make a big difference to the texture. I forgot the salt, but there was enough salt on the chips that it didn't make a difference either.

Guacamole

3 ripe avocados, peeled and seeded
3 T fresh lime juice
1 t. finely minced garlic
1/2 c. diced and seeded tomatoes
2 T chopped cilantro leaves
salt, to taste

1. Place 1 avocado, the lime juice, and garlic in the blender and blend until smooth.
2. Coarsely mash the 2 remaining avocados in a bowl with a fork.
3. Add in the pureed avocado, diced tomatoes, and chopped cilantro; stir to combine.
4. Season with salt and refrigerate, covered, until time to use. Makes 2 1/4 cups.

Wednesday, August 11, 2010

Blueberry-Ginger Scones

Now THIS is a scone!! This was so much better than the last blueberry scone recipe I tried, definitely a keeper. I could barely taste the ginger and the orange, but with lemon curd these were fantastic. The technique was more standard compared to the other recipe, too, with cutting the cold butter into the dry ingredients and then stirring in the wet ingredients. Also, the shape is more traditional. I used half-and-half instead of heavy cream and it didn't seem to make a difference. It was a challenge to stir in the blueberries because the dough was already too thick. I might try to add the blue berries at the same time as the egg mixture next time. Also, the next time I bake these I might brush the top with some egg white and sprinkle it with coarse sugar.

Blueberry-Ginger Scones

4 c. flour
1/4 c. sugar
3 t. ground ginger
2 1/2 t. baking powder
1 t. salt
2 t. grated orange zest
4 eggs, lightly beaten
2/3 c. heavy cream
1 stick (4 oz.) chilled butter, cut into pieces
2 c. fresh blueberries

1. Preheat oven to 400ºF. Lightly grease two large baking sheets.
2. In a large bowl, stir together the flour, sugar, ginger, baking powder, and salt. Stir in the orange zest.
3. In a small bowl, stir together the eggs and the cream; set aside.
4. Using a pastry blender, cut the butter into the dry ingredients until the mixture becomes coarse crumbs. Make a well in the center.
5. Pour in the egg mixture and stir until blended. Add the blueberries and continue stirring gently until the mixture forms a dough that can be gathered into a ball; do not overmix.
6. Divide the dough in half. On a lightly floured surface, pat out one portion of the dough to a 1-inch-thick round, 7 inches in diameter. Repeat with the remaining dough.
7. Using a sharp knife dipped in flour, cut each round of dough into 6 wedges. Transfer the wedges to the prepared baking sheets. Bake until the sconces are puffed and golden brown, 15 to 20 minutes. Serve hot. Makes 1 dozen.

Corn Oysters

This is an old recipe from a Dutch cookbook, they call them Welshkann Oyschters. I was skeptical about using a dry pan, so did some research and found that most recipes call for frying in oil of some sort. I used corn oil. I accidentally added too much salt, but these were good. One cob of corn yields about 1/2 cup, but I would get ahold of 5 cobs for this recipe just in case. I don't know if "canned grated corn" is the same as creamed corn, but I would use the fresh just in case. There was also some confusion about the cayenne pepper listed in the instructions but not in the ingredients. I used a pinch of both black and cayenne pepper. This is a keeper, with the right amount of salt next time!!

Corn Oysters

2 c. grated fresh corn (or canned grated corn)
2 eggs, separated
2 T flour
1 T butter, melted
1/2 t. salt
pinch of pepper
pinch of cayenne pepper
corn oil for frying

1. Mix in flour, egg yolks, salt, peppers, and butter together in a small bowl.
2. Beat the egg whites stiffly and fold into mixture.
3. Drop spoonfuls to look like fried oysters into hot oil. Don't fill pan too full.
4. Cook until browned, flip oysters and cook until other side is browned.
5. Remove from oil and drain on paper towels. Eat while warm. Makes about 20 oysters.

Tuesday, August 10, 2010

Yogurt and Blueberry Scones

I had some blueberries and yogurt to use up so I tried this scone recipe. I used the smaller blueberries, and they were just the right size. I used some pineapple yogurt which had some pieces of pineapple in it, it worked out OK. I halved the recipe, but forgot to read through the recipe before I began and ended up using the whole egg in the recipe instead of only half and then half on the top. But, it was good I did because the recipe would have been too dry if I hadn't mixed it up. I used the little bowl with some cinnamon left over to mix the egg for the top, so there was a bit of cinnamon in the glaze. I found the technique of shredding cold butter without incorporating it into the flour strange, but it seemed to work out OK. This recipe says the scones will be "flaky" and to use "sweet butter" and jam with them. I found them to be a bit to greasy, and flat tasting. They were nice warm with some lemon curd, though. I will not be keeping this recipe, I found a better blueberry scone recipe (see Blueberry-Ginger Scones).

Yogurt and Blueberry Scones

3 c. flour
2 t. baking powder
1 t. baking soda
1/2 t. salt
2 T brown sugar
6 T cold butter
1 1/4 c. plain yogurt
2 eggs
1/2 c. blueberries, fresh or frozen
1/4 t. cinnamon

1. Preheat oven to 400ºF. Grease a cookie sheet.
2. In a medium bowl, combine flour, baking powder, baking soda, salt, and brown sugar. Stir or whisk gently until well mixed.
3. Grate cold butter into flour mixture by using largest holes on a box grater, stirring butter in as you grate so it will not stick together.
4. Make a well in center and add yogurt and 1 egg. Dust blueberries with cinnamon and add to dough. Stir until just combined.
5. Use a 1/4-cup measure to scoop dough onto cookie sheet.
6. Beat remaining egg and brush on top of each scone.
7. Bake 12 to 15 minutes, or until golden brown. Serve immediately. Makes about 16 scones.

Sunday, August 8, 2010

Easy Macaroni and Cheese


I had some cheddar cheese to use up so I thought I would try one of my mac and cheese recipes. This was one I had used before and had written "keep" on it. I had used some cayenne pepper instead of the onions and bell peppers, why I don't know!! However, I liked the idea of cayenne pepper and added a pinch instead of the black pepper. I used green onions, but left out the bell peppers. There was a tiny bit of spiciness, just enough, and I will keep this recipe. I will probably make it the same way I did this time the next time I make it.

Easy Macaroni and Cheese

7 oz. macaroni shells or similar sized pasta
1 T butter
2 T flour
1/4 t. salt
1/4 t. dry mustard
1/8 t. black pepper
1 c. milk
1 c. shredded cheddar cheese
2 T sliced green onions (optional)
2 T chopped red bell pepper

1. Begin boiling macaroni according to package directions.
2. Meanwhile, heat butter in a 1 1/2-quart saucepan over low heat. Stir in flour, salt, mustard, and pepper. Cook over low heat, stirring constantly, until butter is absorbed; remove from heat.
3. Gradually stir in milk. Heat to boiling, stirring constantly. Boil and stir 1 minute.
4. Stir in cheese until melted.
5. Drain cooked pasta. Stir in sauce, onions, and bell peppers. Cook, stirring, until heated through. Serves 4.

Guacamole

I had another avocado so I thought I would try a different guacamole recipe. This one was unique because it called for green onions, sugar, and cumin, and no cilantro. I used some re-hydrated sundried tomatoes in place of the fresh tomato. Like the last recipe, this one was OK, but because I like to "wing it" when I make my guacamole I won't be keeping this recipe. This might be a good recipe for people who don't like cilantro.

Guacamole


2 ripe avocados, peeled and pitted (save one pit)
2 T fresh-squeezed lime juice
1 garlic clove, crushed
1/3 c. thinly sliced green onions
1/8 t. ground cumin
1.8 t. sugar
1 ripe plum tomato
salt
pepper

1. Mash avocados with a fork.
2. Stir in lime juice and garlic until creamy.
3. Stir in onions, cumin, and tomato.
4. Salt and pepper to taste. Combine well.
5. Place pit in the center and cover tightly.
6. Remove pit before serving within 2 hours.

Friday, August 6, 2010

Guacamole

I went to the farmer's market in town yesterday and picked up some avocados and cilantro. I normally just wing it when I make my guacamole, but decided to try out one of my recipes instead. I didn't have any tomatoes, so I chose this recipe. I didn't use jalapeños, but substituted a couple drops of Tabasco sauce instead. I think I overdid it a bit on the lime, but this recipe was alright. I prefer using my regular technique of winging it, though, and decided not to keep this recipe.

Guacamole

2 ripe avocados
2-3 T freshly squeezed lime or lemon juice
1 T finely chopped fresh cilantro
1 T finely chopped jalapeño pepper
1/2 t. finely minced garlic
1/2 t. salt
1/4 t. pepper

1. Halve the avocados, remove the pits and scoop the pulp into a bowl.
2. Add the lime juice, cilantro, jalapeño, garlic, salt, and pepper. Mash coarsely with a fork.
3. Cover airtight with plastic wrap directly on surface and refrigerate up to 3 hours.

Thursday, August 5, 2010

Blueberry Muffins

I made these muffins for some friends who I visited while they were camping at the beach. I wrapped them in foil so they would stay a bit warm while I drove to the beach. This was a good recipe, although I felt like there should be a bit more blueberries. I was surprised when I went to fill in the small muffin tin and there was WAY too much batter. I ended up sacrificing some of the dough in order to get all the berries in the muffins. I filled the muffin cups to overflowing, and was amazed that they didn't overflow over the edge of the pan when they rose. But, it worked out perfectly. Of course the muffin top was the best part!!


Blueberry Muffins

6 T butter, softened, plus more for tins
3 c. plus 2 T flour
3 t. baking powder
1 t. salt
1 3/4 c. sugar, plus more for sprinkling
1 egg, plus 2 egg yolks
1 t. vanilla
1 c. milk
1 3/4 c. fresh blueberries

1. Preheat the oven to 375 degrees. Butter large or small muffin tins, or line with paper liners. In a bowl, sift flour, baking powder, and salt; set aside.
2. In the bowl of an electric mixer fitted with a paddle attachment (I used regular beaters), cream butter and sugar on medium speed until fluffy, about 3 minutes. Add eggs and vanilla; mix until well combined. Reduce speed to low and alternately add flour mixture and milk (beginning and ending with flour).
3. Gently fold in blueberries by hand. Divide the batter evenly among the muffin tins. Sprinkle generously with sugar.
4. Bake until light golden, about 45 minutes for large muffins and about 30 minutes for small muffins. Cook in pan for 15 mintues. Remove from pan and transfer to cooling rack. Makes 6 large or 12 small muffins.

Monday, August 2, 2010

Lemon Blueberry Bread


I got a good deal on some blueberries and had some lemons from the garden, so I went looking for a recipe that used both. This bread is more like a tea cake, and I don't know when I would use it. I don't think I will keep it, knowing that I can find it here when/if I need it later. I didn't like how there were holes in the top of the finished cake. I would have preferred to poke the holes in the base and then just brush the top with the glaze. The taste was good, but of the 8 people who were offered this bread, only one even ate it. I don't think the place was right, perhaps at a tea party?


Lemon Blueberry Bread

1 1/2 c. flour
1 t. baking powder
1/4 t. salt
6 T butter, room temperature
3/4 c. sugar
2 eggs
1/2 t. vanilla
1 T grated lemon zest
1/2 c. milk
1 c. fresh blueberries
1/4 c. sugar
2 T fresh lemon juice

1. Preheat oven to 350ºF and place the oven rack in the center of the oven. Butter the bottom and sides of a loaf pan (9" x 5" x 3").
2. In a separate bowl, whisk together the flour, baking powder, and salt.
3. In the bowl of your electric mixer, beat the butter until softened, about 1 minute. Add the sugar and continue to beat until light and fluffy.
4. Add the eggs, one at a time, beating well after each addition. Scrape down the sides of the bowl as needed.
5. Beat in the vanilla and lemon zest. With the mixer on low, add the flour mixture (in three additions) and milk (in two additions) alternately, starting and ending with the flour. Mix only until combined. Gently fold in the blueberries.
6. Scrape the batter into the prepared pan and bake for about 55 to 65 minutes, or until the bread is golden brown and a toothpick inserted in the center comes out clean.
7. Meanwhile, in a small saucepan, bring the 1/4 cup of sugar and the 2 Tablespoons of lemon juice to a boil, stirring until the sugar dissolves.
8. When the bread is done, remove from oven and place on a wire rack. Pierce the hot loaf all over with a wooden skewer and then brush the top of the loaf with the hot lemon glaze. Cool the loaf in the pan for about 30 minutes then remove from pan and let cool completely on a wire rack. This bread is best served the day it it baked.

Wednesday, June 30, 2010

Gnocchi with Tomato-Cheese Sauce

I had some potatoes to use up, so I decided to make home-made gnocchi!! It wasn't as difficult as I thought it would be, but I will have to try this one again later because I used double the amount of potato (oops). I froze my extra gnocchi , it wasn't too bad, just too potatoey. I loved the sauce, though!! My gnocchi didn't keep their shape really well once they were boiled, probably because there were too many potatoes. I also used basil rather than parsley, which gave the sauce a great flavor. The cream cheese I had on hand was the whipped variety, which worked well without having to soften it up ahead of time. I cooked the gnocchi until it floated. Make sure you serve this dish immediately, as it cools down quickly.


Gnocchi

4 medium potatoes, peeled and diced
1 t. salt
1 1/2 to 1 3/4 c. flour
1/4 t. white pepper

1. Cook potatoes in boiling, salted water until tender, about 20 minutes. Drain well.
2. Mash potatoes.
3. Immediately add flour until thick dough forms. Add salt and pepper.
4. Divide dough into 4 parts. On a floured work surface, roll dough out, a section at a time, into 1/2-inch diameter ropes. Cut into 1/2-inch long pieces.
5. Flour tines of fork and slightly flatten each gnocchi. Place on lightly floured kitchen towel until ready to cook. Repeat process with remaining dough, adding more flour if dough becomes sticky.

Gnocchi with Tomato-Cheese Sauce

1 lb. gnocchi
2/3 c. tomato sauce
16 oz. cream cheese, softened
1 1/2 T butter
4 T chopped parsley
1/3 c. grated Parmesan cheese

1. Plunge the pasta into 5 quarts of boiling, salted water and cook until al dente, about 10 minutes. Drain thoroughly.
2. Meanwhile, in a saucepan, heat together the tomato sauce and half of the cream cheese, stirring until combined.
3. Toss the drained pasta with butter and remaining cream cheese and transfer to a serving bowl. Pour the tomato sauce mixture over the gnocchi, sprinkle with Parmesan cheese and parsley. Serve immediately. Serves 4.

Tuesday, June 29, 2010

Noodle Salad

This recipe sounded unusual, perhaps something that you would bring to a pot luck. I liked the ingredients, but I don't think I would ever make this again. The salad tasted good, but just not my thing. One thing I didn't like was the big chunks of onion, I would have grated the onion to get the flavor but added another crunchy thing to compensate for the texture. Perhaps thin slices of iceberg lettuce, jicama, or water chestnuts?

Noodle Salad

1 package of vermicelli noodles
1 onion, diced
1/2 lb. cheddar cheese, shredded
1 pkg. frozen baby peas
1 pkg. sunflower seeds
1 1/2 c. mayonnaise
1 1/2 c. sour cream

1. Boil noodles, but only until firm soft.
2. Mix noodles with onions, cheese, frozen peas, and sunflower seeds.
3. Mix all together with mayonnaise and sour cream.
4. Put in refrigerator for about 2 hours.

4-Step Bagels

I thought I would try using some of the frozen bread dough rolls and make some bagels. I had a recipe that showed the four steps of making a bagel from hand. Unfortunately, the 4 steps were not complete and I had to go out on the Internet to find out how to finish the bagels. The recipe I had stopped after the boiling. The recipe I found had a better way of making them round, and said I needed to bake them after boiling. They tasted good, though, so I will keep my version of this recipe on a new card in my physical recipe file.

4-Step Bagels

1. Flour your hand and form dough into balls. Punch a hole in the center of each ball.
2. Roll your fingers through the hole. Widen the hole by gently stretching it with your thumb.
3. Broil the bagels 5 inches from heat for 3 to 4 minutes to set the shape.
4. Lower bagels one at a time into boiling water. Boil uncovered for 7 minutes, turning once.

Better Directions

1. Remove dough from freezer the night before and set in a covered container with some damp paper towels.
2. The next morning divide the dough into several chunks. Roll the dough into a thick rope and squish together the ends well. Set bagel on oiled baking sheet and let them rise for about 10-20 minutes, until they look puffy.
3. Preheat the oven to 425ºF. Boil the bagels for a minute on each side. and place on the greased baking sheet. If you would like sesame seeds or poppy seeds, now is the time to add them. The best way to do that is to have the seeds on a plate and dip or roll the bagel in them before placing on the baking sheet.
4. Bake bagels for 10 minutes on each side.

Deviled Eggs

I have never made deviled eggs, but I like to eat them. Since I am not a big mustard fan, I thought I would try this recipe, which doesn't have any prepared mustard in it. I liked these, but the flavor was not quite what I was hoping for. I will keep it until I find a better recipe. I like that this recipe called for dill pickle juice as an ingredient!!

Deviled Eggs

12 eggs, hard-cooked, peeled, and sliced in half lengthwise
4 T mayonnaise
1/4 t. salt
1/2 t. pepper
1 t. dry mustard
2 t. Worcestershire sauce
2 t. dill pickle juice
paprika for garnish

1. Remove yolks from eggs and move to a mixing bowl.
2. Mash yolks with a fork and add all ingredients except paprika.
3. Mix thoroughly and spoon into egg halves or load into a pastry bag and pipe into whites.
4. Sprinkle with paprika. Makes 24 deviled egg halves.

Monday, June 21, 2010

Lemon-Basil Marinade

This marinade smells so amazing!! I can't imagine that this chicken won't taste as amazing, but I will update this post after dinner.

Well, I got my hopes up too high. The marinade smelled great, but I didn't like the flavor of the cooked chicken. Most people would like the taste, but I thought it was too tangy.

Lemon-Basil Marinade

1/2 c. olive oil
1 c. chopped fresh basil
grated zest of 1 lemon
2 large cloves of garlic, crushed through press
2 T white wine vinegar
1 T Dijon mustard

Whisk together and marinate 2 pounds of meat (poultry, veal, lamb, pork, or seafood) for at least a half-hour.

Cry Babies


These cookies are chunky and spicy. I have to say, though, that I don't think I am a spicy cookie person. I suppose that means I can cull the spicy cookies from my recipe boxes now!! I do like the raisin oatmeal cookies, but the molasses was too much for me. For those who enjoy spice cookies, these might be right up your alley. I used chopped almonds instead of walnuts, rolled oats, and butter instead of the shortening. I don't know if that changed the texture or not. The batter was so smooth, probably from the sifted dry ingredients, that I expected them to melt down as they cooked. But as you can see from the picture, they stayed almost the same size as they started. I don't know why they are called "Cry Babies", I suppose it is because the little ones "cry" for more? They would have been better if they ended up softer, perhaps I cooked them a tad too long?

Note: I took these to a potluck, and there was only one left at the end, so people must like spicy cookies!!

Cry Babies

2 c. flour
1 t. baking soda
1 t. cinnamon
1 t. nutmeg
1/2 t. salt
2/3 c. shortening
2/3 c. sugar
1/2 c. milk
1/4 c. molasses
1 t. vanilla
2 c. oats
1/2 c. raisins
1/2 c. walnuts
1 c. chocolate chips

1. Preheat oven to 350ºF.
2. Sift together first 5 ingredients and set aside.
3. Cream together butter and sugar.
4. Stir in egg, milk, molasses, and vanilla.
5. Add remaining ingredients and mix thoroughly.
6. Drop by teaspoonfuls onto un-greased cookie sheets.
7. Bake for 15 minutes and remove to wire rack. Store in airtight container. Makes about 3-4 dozen cookies.

Wednesday, June 16, 2010

Yuletide Toffee Squares

Unfortunately this is not a keeper!! Perhaps I did something wrong, but not only did the chocolate not melt on the top, but the base was too chewy. The flavors all worked together, but the consistency wasn't to my liking. I would rather have true toffee than this pale imitation.

Yuletide Toffee Squares

4 1/2 c. quick or old-fashioned oats
1 c. firmly packed brown sugar
3/4 c. butter, melted
1/2 c. light or dark corn syrup
1 T vanilla extract
1/2 t. salt, optional
2 c. semisweet chocolate chips
2/3 c. chopped nuts, optional

1. Preheat oven to 400ºF. Grease 15 1/2" x 10 1/2" jelly-roll pan.
2. In large bowl, combine oats, sugar, butter, corn syrup, vanilla, and salt. Stir together until well-combined. Firmly press mixture into prepared pan. Bake for 15-18 minutes, or until mixture is brown and bubbly.
3. Remove from oven. Immediately sprinkle chocolate chips evenly over toffee. Let stand 10 minutes. Spread chocolate evenly over toffee and sprinkle with nuts. Cool completely in pan on wire rack. To serve, cut into squares. Makes about 6 dozen cookies.

Tuesday, June 15, 2010

Stir-Fried Chicken Basil

This was a good recipe, but as usual with me I thought there was a bit too much soy sauce flavor. Next time I will try another less soy sauce flavored sauce. Also, I don't like mushrooms, so I substituted carrots, which I cooked first. I liked how the basil leaves got a bit crispy in the oil, but only half of them did this. I put the soggy ones in tomorrow's leftovers container!!

Stir-Fried Basil Chicken

2/3 c. packed fresh basil leaves (about 40 )
1/2 c. water
3 T soy sauce
3 T dry sherry (or water)
4 t. cornstarch
1 t. instant chicken bouillon granules
3-4 T vegetable oil
2 t. finely chopped fresh garlic
12 green onions, cut into 1-inch diagonal slices
16 oz. fresh mushrooms, sliced
2 whole boneless chicken breasts, skinned, cut into 1-inch cubes
2 c. hot cooked rice

1. Wash basil leaves. Lay leaves in a single layer on paper towels and pat dry. Let stand at room temperature for 30 minutes and pat leaves again with paper towels.
2. In a small bowl, stir together water, soy sauce, sherry, cornstarch, and chicken bouillon and set aside.
3. Heat 1-2 Tablespoons of oil in a wok and add basil leaves. Cook over medium high heat, stirring constantly, until glossy green. Use a slotted spoon to remove basil leaves from the hot oil and drain on paper towels.
4. Add garlic to hot oil and cook over medium high heat, stirring constantly for about 15 seconds.
5. Add 1-2 Tablespoons of oil to the wok and add the green onions. Continue cooking, stirring constantly, for another minute.
6. Add the mushrooms and continue cooking, stirring constantly, for another minute. Remove vegetables from wok and set aside.
7. Place chicken in hot wok and cook over medium high heat, stirring constantly, until chicken is fork tender (about 3-5 minutes).
8. Push chicken from the center of the wok. Stir sauce and add sauce to the center of the wok. Cook, stirring constantly, until slightly thickened (1-2 minutes).
9. Return cooked vegetables to wok and stir to coat with the sauce. Cook, stirring constantly, until heated through (about 1 minute). Place on serving plate and sprinkle with cooked basil leaves. Serve over rice. Makes 4 servings.

Wednesday, June 9, 2010

Carole's Mini Chicken Creamy Pesto Pizzas

I created a new recipe from two that I had wanted to try. I used one of those fresh growing basil from the grocery store, hopefully it will survive past this weekend since it needs a lot of water!! I used the Bridgeford frozen white rolls, but any brand of frozen dough rolls should work. When I brought home the rolls I let them that just a little bit so I could separate them before I re-froze them. This made it easier to break apart for thawing in the oven. I used cooked leftover chicken, but you can use whatever toppings will fit. I like my pizza thick, so I didn't press down the dough too far. If you want thinner pizza, just press it down more on the pan. If you want less oil, just toast the pine nuts in a pan or in the oven until golden brown.

Carole's Mini Chicken Creamy Pesto Pizzas

8 frozen dough white rolls
1 T olive oil
1/2 T olive oil
1 T raw pine nuts
1/8 c. olive oil
1/2 cup tightly packed, rinsed, drained, stemmed fresh basil leaves (do not use dried basil)
1 medium clove garlic
1/8 t. salt
1/8 c. freshly grated Parmesan cheese
1 T. freshly grated Romano cheese
3 T butter
1/3 c. whipping cream
1/4 t. salt
dash ground white pepper
dash ground nutmeg
1/2 c. freshly grated Parmesan cheese
1/2 c. chopped cooked chicken
3/4 c. shredded mozzarella cheese

1. Preheat oven to Warm. Remove 6 individual rolls from the package of frozen rolls. Place 1 Tablespoon olive oil in a bowl, separate the rolls from each other and roll in the oil. Place rolls on a baking sheet, spaced staggered for later "squishing" (I usually alternate 2 and 1 rows). Place baking sheet into the warm oven and turn off the oven.
2. While the dough is defrosting in the oven, place 1/2 Tablespoon of olive oil and the pine nuts in a small frying pan. Brown them on medium-high, constantly stirring, for about a minute and a half. Remove nuts to a paper towel when golden brown, they will continue to brown a bit more.
3. Combine pine nuts, basil leaves, garlic, salt, and remaining 1/8 cup olive oil in a blender container. Blend until mixture is evenly blended and pieces are very finely chopped. You may have to stop the process and scrape down the side of the blender container.
4. Transfer the pesto to a small bowl and stir in the Parmesan and Romano cheeses.
5. In a small, heavy pan, place the butter and cream over medium-low heat. Cook, stirring constantly, until blended and mixture bubbles for 2 minutes.
6. Stir in salt, pepper, and nutmeg. Remove from head and gradually stir in the Parmesan cheese, stirring until thoroughly blended and fairly smooth. Return pan to the heat if necessary to completely blend cheese, but don't let the sauce get bubbly or the cheese will become lumpy and tough.
7. Transfer the pesto to the pan of creamy sauce and stir until well combined. You will see the olive oil separate.
8. Preheat oven to 400ºF.
9. Remove the baking sheet of dough and place on a flat surface. Using your hand, "squish" down the dough balls to desired thickness. Using a brush, spread some of the green olive oil on the dough. Spoon some of the creamy pesto onto the dough, followed by some chicken and mozzarella cheese. Try not to let any of the cheese stay on the baking sheet. Squish down the mini pizzas so that they are compact and as flat as you want them to be.
9. Bake for about 7 minutes, or until the mozzarella cheese is golden brown. Remove from oven and transfer to plates or cooling racks. Makes 8 mini pizzas.

Tuesday, June 1, 2010

Tennessee-Style Fried Corn

After boiling up some corn yesterday I had a couple of ears leftover. So, I thought I would try this variation on a family favorite "Corn and Bacon". My family recipe uses small pieces of corn and fries it up with the corn. My grandmother added onions and bell peppers. This recipe has some milk added to it, and just salt and pepper as seasoning. I liked this recipe, but I ended up overcooking the corn and couldn't eat all of it. Next time I would use a bit more milk, and not cook it so long once the milk is added.

Tennessee-Style Fried Corn

6 ears of fresh corn
4 slices of bacon
1/2 c. milk
1 t. salt
1/4 t. pepper
pinch sugar

1. With a sharp knife, cut corn kernels from cob. Also scrape pulp out with back of knife. Set aside.
2. Cut bacon slices in half. Fry in heavy iron skillet until crisp. Drain on paper toweling.
3. Discard all but 4 Tablespoons bacon fat. Add corn. Cook, without stirring, until bottom is browned (lift corn from the side with a spatula to check).
4. When well-browned, add milk and seasonings, stirring until well combined. Cover and cook over low heat for 10 minutes longer. Arrange bacon over the top and serve. Serves 4.

Monday, May 31, 2010

Turkey Pot Pie

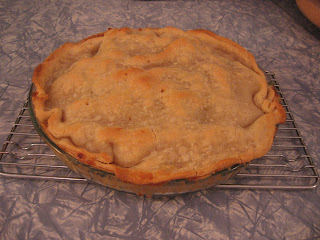
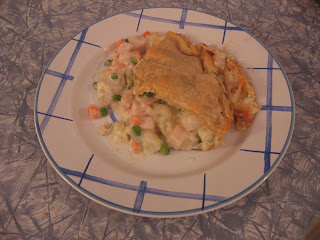
I have created my own recipe for pot pies, and used the same recipe for beef a while back. I used one of those chunks of turkey breast that come shrink-wrapped in the ready-made foods in the meat area of the grocery store. I had some russet potatoes to use up, and some half-and-half, so voilá a pot pie. I used a deeper pie dish and piled up the contents high in the middle. It worked out and didn't leak. Since I didn't use canned potatoes this time, I added the potatoes near the end of the process so they wouldn't get mushy.


Turkey Pot Pie

1 pkg. refrigerated double crust pastry
1 1/2 c. cooked turkey, cubed
1/3 c. flour
1/2 t. salt
1/8 t. pepper
1/2 c. frozen pearl onions
2 T butter
1/2 c. chopped celery, including leaves
1/2 c. chopped carrots
1 T butter
1/2 c. frozen peas
1 c. chicken broth
1 1/2 c. cooked, cubed potatoes
1 c. milk or half-and-half

1. Preheat oven to 425ºF. Place one of the pastry rounds in a 9-inch pie dish, making sure that it is touching the bottom and sides. Trim the extra pastry off, at the outside edge of the pie dish. Prick the bottom several times with a fork. Bake for 5-7 minutes, until the crust is golden brown. Do not over bake. Lower oven temperature to 400ºF after you remove the pie crust to a wire rack.
2. Mix flour, salt, and pepper together in a shallow dish. Add turkey and roll pieces around until they are coated in the flour. Melt 2 T butter in large skillet. Add the turkey (after shaking off flour) and onions, reserving the excess flour for later. Saute until the turkey and onions are browned, about 5 minutes. Remove turkey and onions and place in a heat-proof bowl for later.
3. Melt 1 T butter in skillet. Add celery and carrots. Saute for 5 minutes. Add peas and chicken broth. Bring to a boil, cover and simmer for 5 minutes.
4. Meanwhile, in a 2-cup measuring cup, stir together milk and reserved flour mixture. Whisk slowly into the skillet. Stir until thickened, about 3-5 minutes. Stir in potatoes, turkey and onions.
5. Spoon carefully into bottom crust, keeping the contents in a center mound. Top with remaining pastry, trimming the edge as you did for the bottom. Press the top edge to the bottom edge all the way around sort of sealing them together. Using a fork, prick the top crust several times for vents. Place a baking sheet on the bottom shelf of the oven to catch any overflowing filling. Bake until crust is golden and filling is bubbly, about 15-20 minutes.
6. Let the pie cool on a wire rack for about 10-15 minutes before cutting. Serves 4-6.